
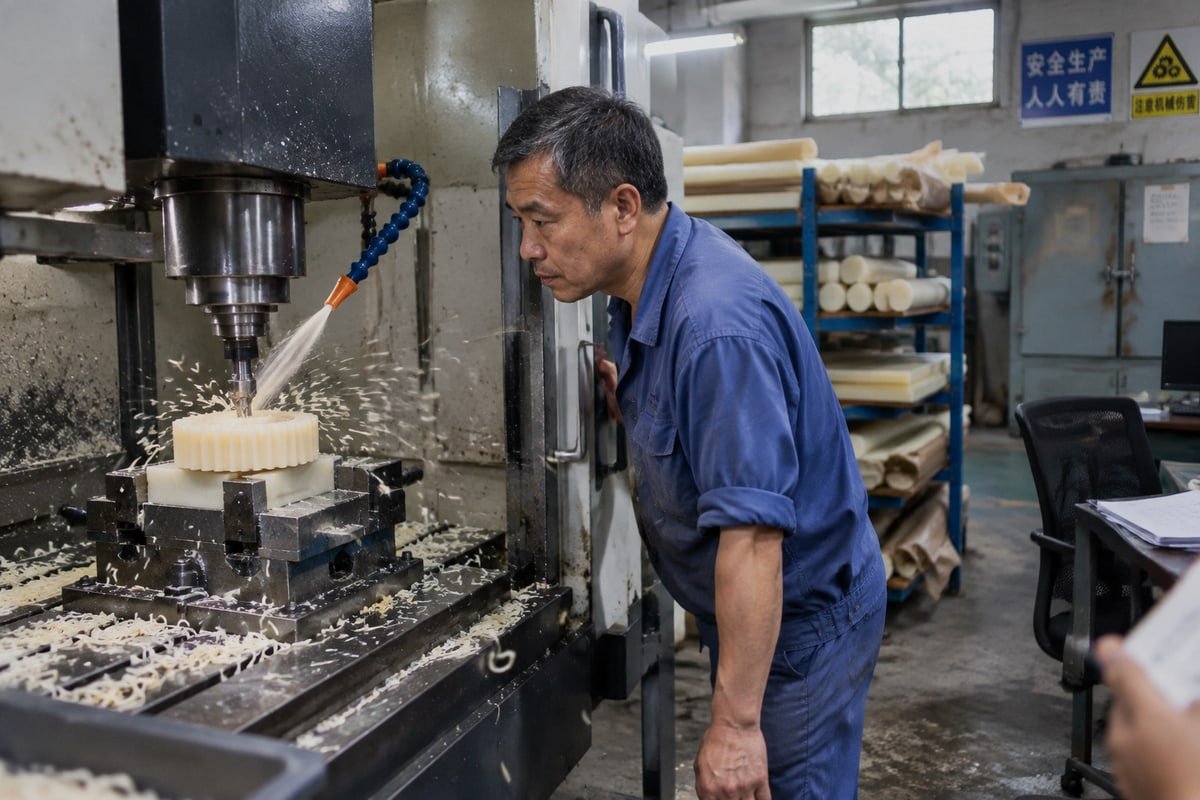
A nylon gear that measured perfect on our inspection bench in Dongguan came back oversized two weeks later. Nylon CNC machining punishes anyone who treats polyamide like aluminum.
Mastering nylon CNC machining means controlling moisture, heat, and part flexibility. Choose the exact polyamide grade, dry the stock, use sharp positive-rake carbide cutting tools, generate real chips with air-blast cooling, clamp gently, straighten long parts after cutting, and inspect only after the part stabilizes.
That is the short version. The long version is a process that runs from the material store to the final inspection report. I will walk through it in four steps. First, pick the grade. Second, set honest tolerances. Third, stop warping and drift. Fourth, finish the part without ruining it.
How do I choose the right nylon grade for my CNC machining project?
One German automation buyer sent us a drawing that simply said 'nylon.' That single word hides at least five materials, each with different stiffness, moisture absorption, and tool wear.
Choose the nylon grade by service environment, not price. Use nylon 6 for impact, nylon 6/6 for stiffness and heat, cast nylon for large wear parts, and glass-filled or carbon-filled grades for dimensional stability. Specify trade name, datasheet, filler, color, and conditioning state on the drawing.

Nylon is a family, not a material. Every grade we machine behaves a little differently under the cutter and a lot differently in the field. So the first question I ask a buyer is not "what size?" but "where does this part live?" Load, speed, temperature, chemicals, humidity, and electrical needs decide the grade. The grade then decides the tooling, the drying cycle, and the achievable tolerance.
Comparing the common machining grades
| Grade | Strengths | Watch-outs | Typical parts we cut |
|---|---|---|---|
| Nylon 6 | Toughness, impact resistance, low cost | Highest moisture absorption, needs careful conditioning | Bushings, guides, spacers |
| Nylon 6/6 | Higher stiffness, better temperature capability | Still moves with humidity | Gears, rollers, housings |
| Cast nylon 6 | Good machinability, large sections, lower internal stress | Properties vary by supplier and casting | Large rollers, wear pads, sheaves |
| Glass-filled nylon | Stiffness, strength, dimensional stability | Abrasive to tools, harder to finish, dust | Structural brackets, pump bodies |
| Oil-filled or MoS2-filled nylon | Low friction, long wear life | Slightly lower strength | Wear strips, sliding plates |
| Carbon-fiber-reinforced nylon | Highest stiffness, lower thermal expansion 1 | Very abrasive, costly, demanding finish | Lightweight structural components |
Nylon 6/6 properties are the usual starting point for mechanical parts. It is stiffer than nylon 6 and holds up better at temperature. But it is not immune to humidity. Published figures put moisture absorption anywhere from about 2.5% in mild conditions to 7–9% by weight for some grades in wet environments. That spread is why I never quote one number. The resin, geometry, and exposure time all change it.
What reinforcement does to your tooling
A buyer often asks me, "Can we save money with HSS tools instead of carbide?" For unfilled nylon, yes. Sharp high-speed steel with polished flutes cuts clean and costs less. For glass-filled nylon, no. The glass fibers grind the edge away quickly. We move to carbide cutting tools 2, and for longer runs we use PCD or TiB2-coated tools and drop the cutting speed. A dull edge on reinforced nylon does not just hurt the finish. It rubs, heats the surface, and pulls the flexible part out of position.
How to write the material callout
Order generic "nylon" and you invite a substitution risk. Our DFM feedback always asks for five things: the trade name, the datasheet, the filler type and percentage, the color, and the conditioning state 3 at delivery. That last item matters more than most engineers expect, and it leads straight into the tolerance discussion.
What tolerances can I realistically achieve when machining nylon parts?
Every nylon quote we write forces the same trade-off: the machine can hold ±0.01 mm, but the material will not sit still long enough to prove it.
Realistic nylon machining tolerances are about ±0.05 mm on small, dried, well-fixtured parts, and looser on long or thin features. Anything tighter than ±0.05 mm is risky because moisture absorption and thermal expansion move dimensions after machining. Always specify tolerances at a defined temperature and humidity.

There are two different tolerances in nylon work. The first is machine tolerance. Our 3-axis and 5-axis mills repeat within 0.01–0.005 mm on metal every day. The second is stable functional tolerance. That is the size the part still shows after it cools, relaxes, springs back from the clamp, and takes on moisture. Only the second one matters to your assembly.
What moves a nylon dimension after the cut
| Driver | What happens | How we control it |
|---|---|---|
| Moisture absorption | Part swells, bores shrink | Dry stock, define inspection humidity, re-measure after conditioning |
| Thermal expansion | Part grows while warm from cutting | Air-blast cooling, measure at stable room temperature |
| Clamping spring-back | False size while clamped, shift after release | Soft jaws, distributed pressure, inspect after unclamping |
| Tool rubbing | Melted edge, oversize or undersize wall | Sharp positive-rake tools, correct chip load 5 |
| Residual stress | Bow or twist, especially on long parts | Rough both sides, 24-hour rest before finishing |
Starting-point parameters we validate with test cuts
Starting points only. Check the material datasheet and prove every value with a test cut on your machine.
- Milling speed: about 600–1200 SFM (roughly 200–300 m/min)
- Milling feed: about 0.002–0.015 in per tooth, depending on cutter and operation
- Finishing depth: about 0.005–0.020 in
- Turning: about 150–500 ft/min at 0.003–0.015 in/rev
- Drilling: about 500–1000 RPM at 0.004–0.012 in/rev; peck any hole deeper than two diameters
- Rake angle: 10–15° positive, single or two-flute polished cutters
- Design minimums: walls above about 1.5 mm, internal radii above about 0.8 mm
- Expected surface roughness: around Ra 0.8–3.2 μm
A common objection I hear is, "Just run the spindle faster for a better finish." Faster alone does not help. High RPM with low feed means the edge rubs instead of cutting. Rubbing makes heat, heat makes melt, and melt makes a bad dimension. Feed rates and speeds must be calculated together as chip load for the real cutter and flute count. Real chips mean real cooling.
Thin walls add another problem. The cutter pushes the wall away, then the wall springs back. Some shops now use sensor-integrated tool holders that measure this push-away and let the controller adjust offsets in real time. Cryogenic CO2 cooling and ultrasonic-assisted machining also appear in research for micro-features and chip breaking. These are useful for special jobs. They are not a substitute for dry stock and a sharp tool.
How do I prevent warping and dimensional drift during nylon CNC machining?
The hardest lesson our shop learned with polyamide is simple: nylon deforms easily, and long bar-shaped parts almost always need skilled straightening after machining.
Prevent warping in nylon CNC machining by drying stock at 80–100°C, roughing both sides, resting parts 24 hours before finishing, clamping with distributed pressure, cooling with air blast instead of flood coolant, and straightening long workpieces after machining. Inspect only after thermal and moisture equilibrium.
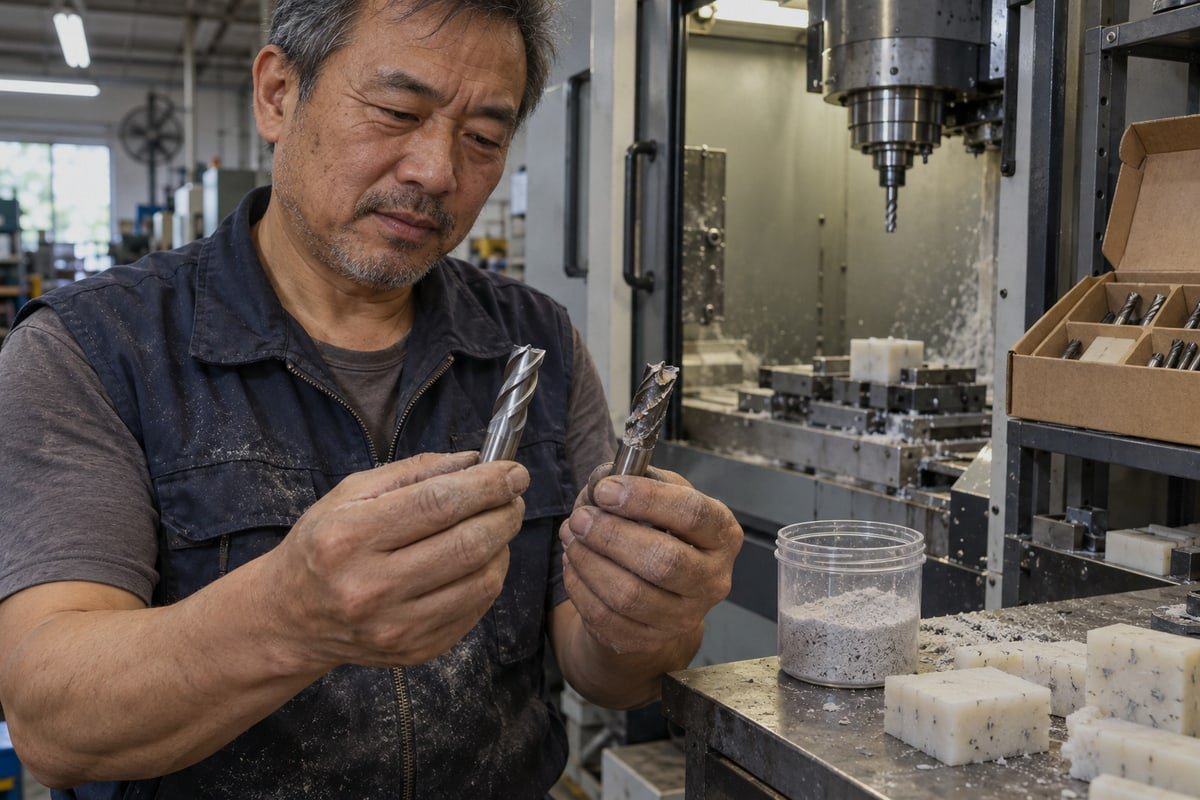
Warping is not one defect. It is the sum of wet stock, uneven stress, excess heat, and hard clamping. I treat it as a process, so here is the sequence we follow from stock to inspected part.
The stock-to-part sequence we follow
- Store nylon stock sealed in a low-humidity area, not on an open rack.
- Dry it per the datasheet. Common guidance is 80–100°C for 4–24 hours; a typical cycle is 80°C for 8–12 hours, longer for thick plate.
- Let it cool sealed so it does not pull moisture straight back.
- Rough both sides evenly. Leave a consistent finishing allowance.
- Rest the part for 24 hours. Internal stress and moisture settle during this window.
- Re-fixture on finished surfaces with soft jaws, collets, or a vacuum chuck. Use only enough force to stop movement.
- Finish with light, continuous passes. Climb mill. Never dwell in a corner.
- Keep chip evacuation constant with compressed air. Use peck cycles or interrupted cuts so stringy chips break instead of wrapping the spindle.
- Unclamp, let the part reach room temperature, then measure.
Why long parts need straightening skill
Flexibility is the part of nylon that no parameter table covers. A long rail or bar comes off the machine looking fine, then bows an hour later as stress releases. On our production line, long nylon workpieces go to an experienced operator for corrective straightening after machining. It is a learned skill. Too little correction and the part stays bowed. Too much, or too fast, and you introduce new stress that returns later. Our team checks flatness after the part has rested, corrects it in stages, and re-checks after another rest. Buyers in the US and Europe rarely see this step, but it is the reason their rails arrive straight.
Air or flood coolant? Resolving the objection
Engineers often push back: "Flood coolant removes heat better, so why not use it?" They are right about heat. Heavy coolant does improve finishing in some cases. But water-based coolant soaks the part, and a wet part grows. Our default is high-pressure air blast for chip evacuation and localized cooling. We move to mist or controlled coolant only when heat cannot be managed otherwise, and we never leave finished nylon sitting wet. We also check chemical compatibility against the grade before any coolant touches it.
Quick defect diagnosis
| Symptom | Likely cause | First fix |
|---|---|---|
| Melted or smeared edge | Dull tool, low feed, dwell | Sharper tool, raise chip load, keep tool moving |
| Bow or twist | Wet stock, uneven roughing, stress | Dry, rough both sides, rest, straighten |
| Chatter | Overhang, weak support, high engagement | Shorter tool, more support, less radial cut |
| Stringy chips | Poor flute geometry, weak evacuation | Polished flutes, air blast, peck cycles |
| Size shifts after days | Moisture absorption | Condition, inspect at defined humidity |
Which surface finishing options work best for my nylon machined parts?
Last year a medical-device customer rejected a batch of nylon bushings for fuzzy edges, not size. That job pushed our finishing team to treat burr removal as a controlled process.
The best surface finishing options for nylon machined parts are sharp-tool deburring, light bead blasting for a uniform matte look, dyeing for color, and controlled annealing for stress relief. Avoid aggressive vapor polishing or chemical treatments unless validated, because they can change dimensions and moisture content.

Finishing nylon is mostly about not undoing the work you just did. The part is flexible, soft, and hygroscopic. Every secondary step adds either heat, moisture, or pressure. So we rank finishing options by how little they disturb the part.
Finishing options compared
| Option | Best for | Risk to watch |
|---|---|---|
| Hand deburring with knife or scraper | Edges, holes, threads | Operator skill, consistency across a batch |
| Light abrasive or controlled tumbling | Small parts with simple geometry | Rounding of sharp features, dust |
| Bead blasting | Uniform matte, hiding tool marks | Slight dimensional loss, embedded media |
| Dyeing | Color coding, cosmetic parts | Moisture uptake during the dye bath |
| Annealing (about 300–350°F) | Stress relief before final finishing | Dimension change if ramp and cool are not controlled |
| Vapor polishing | Clarity on select grades | Surface softening, size change, grade dependent |
Burr removal without damage
Nylon burrs are not like steel burrs. They are soft, stringy, and attached. The best burr removal starts at the cutter. Sharp positive-rake tools, a backer under the exit side, and correct feed produce clean edges that need almost no touch-up. When burrs do appear, we remove them with a sharp blade and low pressure. We do not grind them. Grinding heats the edge and smears it. For filled grades, we also control dust, because glass and carbon particles are a health hazard and an abrasive mess around the machine.
Inspect after finishing, not before
A finished nylon part is a new part. Blasting removes material. Dyeing adds water. Annealing moves stress. So our quality team measures critical features after the last secondary process and after a stabilization interval, at a defined temperature and humidity. We use low-contact-pressure instruments on thin features so the gauge does not deflect the wall. For export customers who need documents, we record the grade, batch, drying cycle, tools, parameters, fixturing, and inspection conditions. That record is what makes batch number ten match sample number one.
Conclusion
Nylon punishes shortcuts but rewards process control. Pick the exact grade, dry it, cut sharp, clamp soft, straighten long parts, and measure after stabilization. Send your drawing for DFM feedback.
Footnotes
1. Provides technical coefficients for thermal expansion, essential for calculating dimensional stability in engineering plastics. ↩︎
2. Authoritative industry guidance on selecting appropriate tool materials and geometries for machining various plastic polymers. ↩︎
3. ISO standard for polyamide materials, specifically addressing the classification and conditioning of nylon grades. ↩︎
4. Explains the chemical structure and hygroscopic nature of Nylon 6/6, which causes dimensional changes. ↩︎
5. Scientific definition and engineering context for chip load calculations in material removal processes. ↩︎

 עִבְרִית
 English
 Italiano
 Français
 日本語
 Deutsch (Sie)
 Español
 Русский
 العربية
 Български
 Čeština
 Dansk
 Suomi
 हिन्दी
 Nederlands
 Português
 Română
 Slovenčina
 Svenska
 ไทย
 Tiếng Việt
 Türkçe
 Slovenščina