In precision machining, tolerance error is not only a measure of product quality but also a key factor affecting enterprises’ productivity and cost control. Making a mistake is a natural part of the learning process in precision machining. For high-precision requirements of the parts, even a small size deviation may lead to assembly difficulties, functional failure, and even directly affect the product life. With the manufacturing industry moving to high-end, intelligent development, effective reduction of tolerance error has become a significant focus in the direction of processing companies. This article will detail some practical skills to reduce tolerance errors, help enterprises improve their processing levels, and reduce errors in production.
Understanding Error Tolerance: What is error tolerance and why is it important?
Error tolerance refers to the acceptable amount of deviation or variation from a specified dimension, measurement, or performance standard without negatively impacting the functionality or quality of a product or system. In technical fields like engineering, machining, and manufacturing, this is typically expressed as a range, such as a tolerance of ±0.01 mm, meaning the actual measurement can deviate by 0.01 mm either way from the target value and still be considered acceptable.
Error tolerance is crucial for several reasons:
Tolerance ensures that even if parts are not produced with absolute precision, they will still fit together and function as intended. For example, in an engine, parts must fit within a certain tolerance to ensure proper movement and avoid friction or jamming. Making mistakes during the manufacturing process can provide valuable insights and lead to improved functionality over time.
Achieving perfect precision in every part can be prohibitively expensive and time-consuming. By understanding standard deviation and defining acceptable error tolerances, manufacturers can balance precision and cost-effectiveness, minimizing waste while ensuring parts meet the necessary standards.
Properly managed tolerances ensure that a product maintains consistent performance and reliability. Tight tolerances are often necessary in high-precision industries like aerospace, medical devices, and electronics, where slight deviations could lead to failure. Such an organization that embraces error tolerance can consistently produce high-quality products.
Parts produced to specific tolerances can be mass-produced and assembled regardless of where they were manufactured by understanding the task demands and capabilities involved. This enables more straightforward repairs, replacements, and scalability in production lines, especially in the automotive and electronics industries, where parts come from multiple suppliers.
Tolerances help define quality control standards in production. By having defined acceptable error limits, manufacturers can reduce the number of defective parts, leading to fewer material and labor costs associated with scrapping or reworking products.

Tool selection and maintenance: control human error from the source
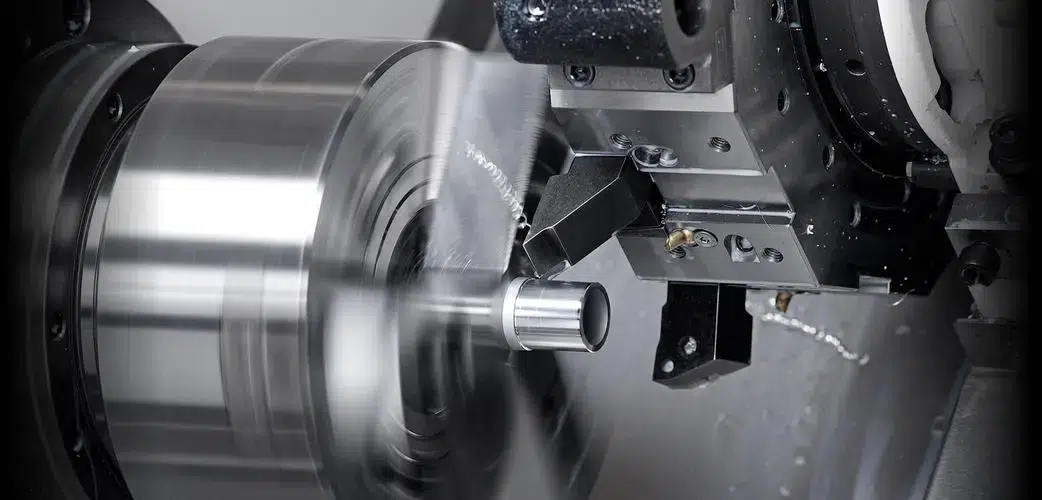
A cutting tool is in direct contact with the workpiece in processing, and its selection and maintenance directly impact machining accuracy. Selection of suitable tool material and regular maintenance of tool condition are the basis for reducing tolerance errors and helping solve problems related to machining accuracy.
Selection of suitable tool material: different tool materials have different properties and scope of application. For example, cemented carbide tools excel in machining high-hardness materials, providing stable cutting results and reducing tool wear, thus ensuring machining accuracy. In specific high-temperature, high-speed cutting scenarios, ceramic or cubic boron nitride (CBN) tools are a better choice, with their wear resistance and thermal stability effectively reducing errors.
Tool geometry optimization: The geometry of the tool, especially the cutting edge angle and tip radius, directly affects machining accuracy. The tool should be meticulously designed and optimized for precision machining to reduce the cutting force and error caused by tool deformation during the cutting process.
Regular maintenance and replacement of tools: Tool wear not only affects the surface quality of the workpiece but may also lead to dimensional errors. Dulled tools require greater cutting force, which generates more excellent heat in the workpiece and leads to dimensional overruns. Therefore, checking, resharing, or replacing the tool after it reaches a specific use cycle is recommended to ensure it works in the best condition.
Reasonable adjustment of cutting parameters: find the best balance of processing
Cutting parameters are important factors that affect the error in the machining process. Too high or too low cutting speed, feed rate, depth of cut, and other parameter settings may lead to machining accuracy problems. Reasonable setting of these parameters can effectively reduce the tolerance error. Embracing mistake tolerance in adjusting these cutting parameters can lead to better learning and optimization of the machining process.
Optimize the cutting speed and feed rate: The choice of cutting speed and feed rate affects machining efficiency and directly affects the workpiece’s dimensional accuracy. Too high a cutting speed may lead to rapid tool wear and workpiece surface quality degradation, while too low a speed will increase the workpiece’s heat time, triggering thermal deformation. Therefore, the actual processing should be based on material properties, tool type, and process requirements to find an optimal cutting speed and feed rate balance.
Cutting depth control: Excessive cutting depth increases the cutting force, leading to deformation of the workpiece and machine tool, which in turn affects dimensional accuracy. The depth of cut control is particularly critical in processing thin-walled or long-shaft parts. A number of light cuts can gradually approach the size requirements, thus reducing the error.
Machine calibration and maintenance: to ensure the stable state of the equipment
Precision machine tools are the basis for ensuring high-precision machining. Prolonged use, changes in ambient temperature, and the natural wear and tear of machine components will affect the geometric and motion accuracy of the machine tool, resulting in machining errors.
Regular calibration of machine tools: After long-term use, machine tools may experience increased clearance between the nut and the screw, wear of the guideway, etc., all of which can lead to a decrease in positioning accuracy. Therefore, regular calibration and testing of the machine tool’s geometric accuracy and transmission accuracy can effectively avoid the accumulation of equipment errors and ensure the consistency of machining dimensions.
Improve the anti-vibration performance of machine tools: Machine tool vibration is one of the essential sources of machining errors. Vibration not only affects the surface roughness of the workpiece but also causes tool deflection, workpiece positioning deviation, and other problems. Therefore, the machine tool vibration damping device, foundation reinforcement, etc., can improve the vibration resistance of the machine tool and reduce errors in the machining process.
Appropriate preheating of the machine tool: Since temperature greatly affects machine tools, the lower temperature of the machine tool when it is first turned on may lead to dimensional instability. By preheating the machine, the machine can be brought to a stable operating temperature, reducing the effect of thermal expansion on dimensions.
Workpiece clamping: improving stability and reducing errors
How a workpiece is clamped directly determines its stability during machining. Unstable clamping or repeated clamping will increase the tolerance error.
Choosing the right fixture: Using a unique fixture that fits the workpiece ensures that the workpiece remains stable and does not shift during machining. For complex shapes or flexible workpieces, consider using customized fixtures or vacuum adsorption fixtures to improve the stability of the clamping.
Reduce the number of clampings: Each clamping repositioning will result in errors, especially in multi-process machining. If possible, clamping can be used to complete multiple processes of machining methods to reduce the accumulation of errors caused by repeated clamping.

Control of the machining work environment: temperature and thermal deformation management
The ambient temperature and the heat generated inside the machine tool are invisible factors that affect the dimensional accuracy of the workpiece. When the temperature varies greatly, the workpiece and the machine tool undergo thermal expansion or contraction, resulting in dimensional errors. Maintaining a sense of these environmental factors, such as temperature, is crucial to ensure machining accuracy.
Maintaining a constant temperature workshop: Precision machining has high demands on the ambient temperature, and temperature fluctuations can lead to inconsistent thermal expansion of both the workpiece and the machine components. Therefore, a constant temperature workshop is standard for many high-precision machining companies. By controlling the temperature of the workshop within a stable range, the dimensional changes brought about by temperature can be effectively reduced.
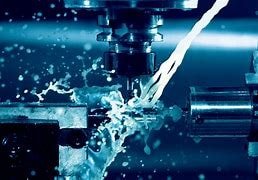
Coolant management: Coolant not only cools tools and workpieces, reducing heat accumulation, but also improves tool life and machined surface quality. Optimizing the flow rate and temperature of the coolant can effectively control the thermal deformation during machining and ensure the dimensional accuracy of the workpiece.
Precision Measurement and Feedback: Closed Loop Control Ensures Quality
High-precision measuring equipment is the last safeguard to reduce tolerance errors. Through high-precision measurement and real-time feedback, deviations in machining can be found and corrected in time, helping to solve problems related to machining accuracy.
High-precision online measurement: During the machining process, high-precision measuring equipment such as Coordinate Measuring Machines (CMM), laser range finders, etc. enables real-time monitoring of the dimensions of the workpiece. The machining parameters can be adjusted quickly after deviations are detected to ensure the final accuracy of the workpiece.
Closed-loop feedback control: Connect the measurement results with the machine control system to form an automated closed-loop control. This method involves real-time adjustment of cutting parameters, tool compensation, etc., to ensure that errors in the machining process are corrected in a timely manner. This intelligent machining control method can significantly improve accuracy and reduce human intervention.
Conclusion
Reducing tolerance errors is not only a process challenge but also the combined effect of comprehensive management, equipment maintenance, environmental control, and measurement feedback. By optimizing tool selection and maintenance, reasonable adjustment of cutting parameters, regular maintenance of machine tools, improved clamping methods, control of the machining environment, and precision measurement, you can effectively reduce errors and enhance the quality of machining and productivity. Through these methods, precision machining companies can ensure the delivery of high-precision products, enhance market competitiveness, and provide customers with higher-quality solutions. Emphasizing mistake tolerance can further reduce tolerance errors and improve overall machining quality by fostering an environment where errors are seen as opportunities for improvement.
